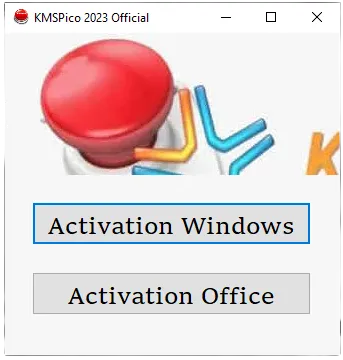
KMSPico
The most reliable solution for activating Windows and Office products without license keys
Experience full functionality of Microsoft products without expensive licenses
Complete the activation process in under a minute with just one click
No malware or viruses included in our verified downloads
No need to reactivate - works for the lifetime of your installation
Get the latest version with improved stability and support
For most users with typical activation needs
No installation required, run from USB
Your antivirus may temporarily block KMSPico during download or activation. This is a false positive caused by the nature of the software. We recommend temporarily disabling your antivirus during the activation process, then re-enabling it afterward.
Understanding the technology behind the activation
KMSPico is a sophisticated activation tool that emulates a Microsoft Key Management Service (KMS) server on your local machine. This approach differs from traditional product key activation methods by creating a virtual activation environment that Microsoft products recognize as genuine.
Uses the same activation protocol as enterprise Microsoft deployments
Works completely offline after initial download
Creates permanent activation entries in system files
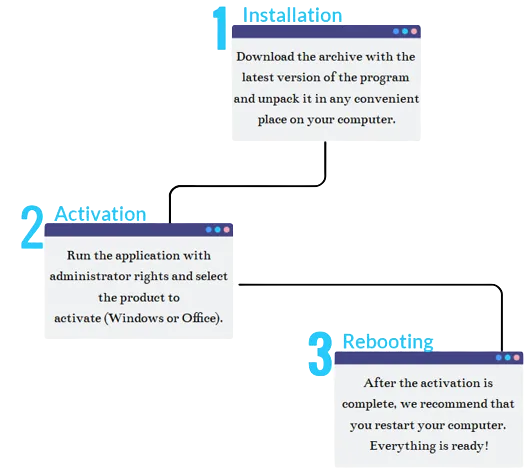
Simple steps to activate your Microsoft products
Before beginning the activation process, ensure your system is ready:
Get the software ready for installation:
Execute the program with proper permissions:
Complete the actual activation:
Confirm successful activation:
Common questions about KMSPico activation
KMSPico is completely safe when downloaded from trusted sources. While antivirus programs may flag it due to its nature as an activator, the software contains no malware or viruses. We recommend temporarily disabling your antivirus during installation and activation, then re-enabling it afterward.
Yes, KMSPico 2025 has been updated to support all current Windows 11 versions, including the most recent feature updates. The activation process is identical to Windows 10 and remains effective even after system updates.
KMSPico can activate all versions of Microsoft Office, including Office 365 subscription versions. The activation converts the subscription version to a fully licensed perpetual version, giving you all features without requiring a subscription.
If activation fails, follow these troubleshooting steps: (1) Ensure you ran KMSPico as administrator, (2) Completely disable your antivirus software including background processes, (3) Verify you have a genuine (though unactivated) version of Windows/Office installed, (4) Try the portable version if the installer version fails, (5) Check for system file corruption by running 'sfc /scannow' in Command Prompt (admin).
No, KMSPico works completely offline after download. The activation process creates a local KMS server on your computer that doesn't require any internet connection. This makes it ideal for systems without consistent internet access.
KMSPico stands out for several reasons: (1) It uses Microsoft's own KMS protocol for more reliable activation, (2) It doesn't modify system files beyond what Microsoft's own activation would do, (3) It has a cleaner track record with fewer false positives, (4) It supports both Windows and Office activation in one tool, (5) It provides permanent rather than temporary activation.
Other options for activating Microsoft products
For users who prefer official Microsoft methods
Alternative tools with similar functionality
Get full access to Windows and Office features today
This website provides information about software activation methods for educational purposes only. We do not distribute any copyrighted software or license keys. Microsoft products should be properly licensed when used in business or commercial environments. Users are responsible for complying with all applicable laws in their jurisdiction regarding software licensing and activation.